See also my posts on the crocodile stitch: How to • Pattern: Crochet Owl
Recent Posts

Showing posts with label stitches: crocodile stitch. Show all posts
Showing posts with label stitches: crocodile stitch. Show all posts
Sunday, August 26, 2012
Win 5000 Feet of Yarn!
See also my posts on the crocodile stitch: How to • Pattern: Crochet Owl
Friday, July 27, 2012
Crocodile Stitch III: Crochet Owl
 |
| Hoo-Hoo |
I'm going to attempt to write out how I did this (first pattern...eek!). I used this Bernat pattern (site requires registration) and its companion youtube video tutorial as a reference to figure out my crocodile stitch body, and I came up with the other parts. Please post a comment if you notice anything funky or if you've suggestions for me to improve my instructions.

(substitute with your favourite worsted weight yarn and hook size):
C hook / 2.75mm hook for the owl body
E hook / 3.5mm hook for the rest
Loops & Threads Impeccable Aqua
Small amount of Red Heart Soft Touch White
Small amount of Red Heart Kids Yellow
Yarn needle to weave in ends and sew parts together
Black embroidery thread to embroider eyes of owl
Pins to help you position your parts while you sew them together
Dimensions / Gauge:
My owl is approximately 5" tall and 3" wide.
Gauge is not applicable in this project.
Gauge is not applicable in this project.
Abbreviations used:
| rnd | round |
| ch | chain |
| sc | single crochet |
| dc | double crochet |
| st | stitch |
| sl st | slip stitch |
| FO | fasten off |
Number in ( ) at the end of each round: total number of stitches you should have by the end of the round.
Note:
The crocodile stitch takes up quite a bit of yarn, since each row is made of the base double crochet stitch, plus the crocodile stitch on top of it, so make sure you've enough yarn in the body colour.
Pattern:
Body:

Because I used this Bernat pattern (free pattern available after you register) and its companion youtube video tutorial as my reference, I don't feel right writing out the steps here. Sorry for the inconvenience!
Please do refer to the above to get your owl body done. You can't get better step-by-step instruction than what's provided in the video.
Just a few notes:
-The starting chain should be in multiples of 6 plus that chain-3, which will act as a 1 dc stitch. I did 36 and had 6 crocodile stitches.
-Turn your work 90° so it's vertical and it'll be slightly easier to insert your hook.
-To find the middle point, aka the 3rd dc, of the skipped 5 dc group, I find it helpful to look behind my project for the five posts I've skipped in the previous row.
-When you have completed all the crocodile stitch rows, work rows of sc (the grey part) until the desired height.
Wings (make 2):
I alternate between sc and dc just to make the pattern on the wing more interesting. You can do all sc all if you prefer.
| Rnd 1 | Ch 3. 1 sc in 2nd chain from hook. 1 sc in the next chain. (3) Ch 1. Turn. |
| Rnd 2 | 2 sc in each st (4) Ch 1. Turn. |
| Rnd 3 | *1 sc in next st, then 2 sc in next st (inc)* repeat 2 times (6) Ch 1. Turn. |
| Rnd 4 | *1 sc in next 2 st, then 2 sc in next st (inc)* repeat 2 times (8) Ch 3. Turn. |
| Rnd 5 | *1 dc in next 3 st, then 2 dc in next st (inc)* repeat 2 times (10) Ch 1. Turn. |
| Rnd 6 | 1 sc in each stitch (10) Ch 3. Turn. |
| Rnd 7 | 1 dc in each stitch (10) Ch 1. Turn. |
| Rnd 8 | 1 sc in each stitch (10) Ch 3. Turn. |
| Rnd 9 | 1 dc in each stitch (10) Ch 1. Turn. |
| Rnd 10 | 1 sc in each stitch (10) Ch 3. Turn. |
| Rnd 11 | 1 dc in each stitch (10) When you reach the end, FO, or sc around the edge of the wing. Leave tail for sewing. (I personally like it better with the edging but it's optional.) |
Eyes (make 2):
| Rnd 1 | Make a magic ring with 6 stitches in it. (6) |
| Rnd 2 | 2 sc in each st. (12) |
| Rnd 3 | *1 sc in next st, then 2 sc in next st (inc)* repeat 6 times (18) |
| Rnd 4 | *1 sc in next 2 st, then 2 sc in next st (inc)* repeat 6 times (24) |
| Rnd 5 | *1 sc in next 3 st, then 2 sc in next st (inc)* repeat 6 times (30) |
Embroider Owl's sleepy eyes, or make an awake version and use a small piece of felt circle as eyes.
Nose:
| Rnd 1 | Make a magic ring with 6 stitches in it. (6) |
| Rnd 2 | *1 sc in next st, then 2 sc in next st (inc)* repeat 3 times (9) |
| Rnd 3 | *1 sc in next 2 st, then 2 sc in next st (inc)* repeat 3 times (12) |
| Rnd 4 | *1 sc in next 3 st, then 2 sc in next st (inc)* repeat 3 times (15) |
| Rnd 5 | *1 sc in next 4 st, then 2 sc in next st (inc)* repeat 3 times (18) |
Assembly
Pretty simple. Sew each part to the body (nose and wings before eyes) at the appropriate spot.
For the tassel on the two sides:

-Use your hook to draw each yarn through one of the stitches near the top. Pull half of the yarn over.
-Tie a double knot with all the pieces of yarn.
-Cut tassel to desired length.
As usual, this pattern is for personal use only. Please do not sell items made from it (charity okay). Please do not repost pattern anywhere, but link to this post ( http://ow.ly/cyLp8 ). Thanks!
Have fun making your own crochet owl!
Saturday, July 21, 2012
Crocodile Stitch Crochet II

Having learned the crocodile stitch, I was planning to make a cell phone cozy, but as I was happily crocheting along, I realized that the cozy is getting real heavy. The crocodile stitch makes a thick layer, so there's no way I can carry this around. ::sigh:: I guess I have to go to Plan B...which is... I don't know.
Any ideas for me? Please share in the comments.
Speaking of cell phone cozy, I was poking around the net, and found these cute cell phone holders that probably require some sturdiness to sit on the table. Hmmm.... Sturdiness provided by the said crocodile stitch perhaps?
 |
| Visit Skymagenta's Crochet blog to see more and her Etsy shop to get the patterns |
Thursday, July 19, 2012
Watch: How to Crochet Crocodile Stitch
The crocodile stitch (sometimes known as mermaid tears) is a really interesting looking stitch that creates what looks like scales. It's time consuming though (compounded by the fact that I'm new and slow), since you have to do a base row first, and then put the scales "on top" of it. However, this crocodile stitch is fun to do and definitely worth your time.
Learning the crocodile stitch: Many have commented on how it can take a while to figure out the crocodile stitch, but this wonderful video tutorial from Mikey and the Crochet Crowd explains things really well. As usual, there are lots of similar videos showing you how to do the stitch so watch a few different ones to find the instruction that makes the most sense to you.
What can you make with crocodile stitches? Most common things I've seen include scarves, purses, wrist/neckwarmers, shawls and hats, but me being not a big fan of pretty things, the following creations are more much inspiring for me. I'm going to work on a few things with my new skill in the next few days. Let see if I can make it work.
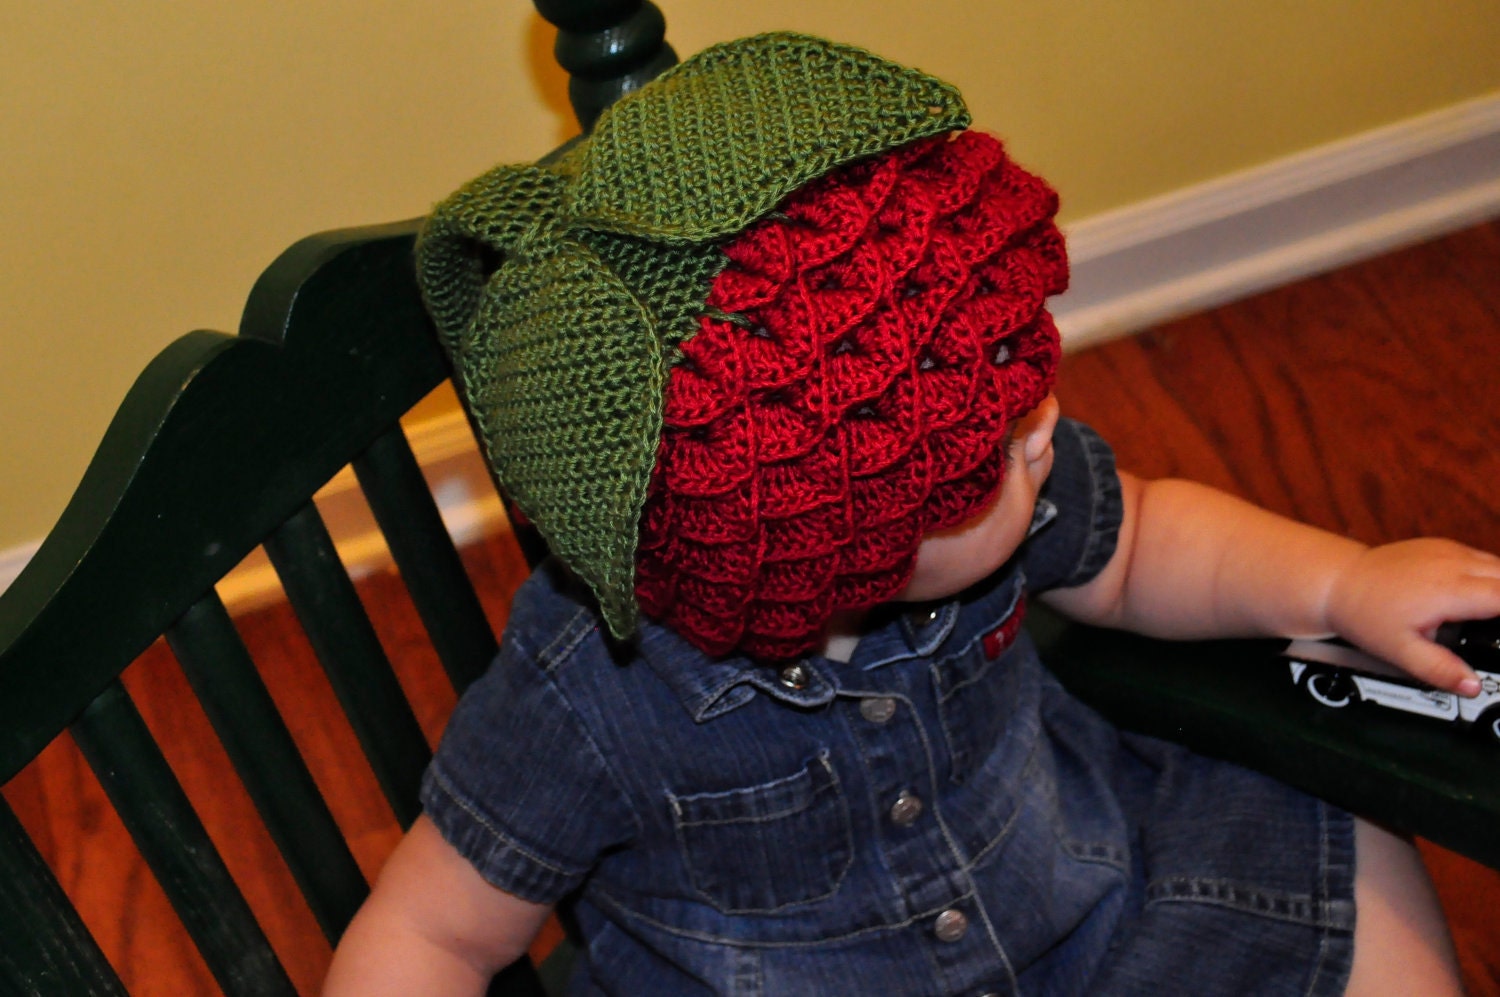 |
| Berry Hat from Craftsy |
 |
| Chain Mail on Craftzine |
 |
| Craftsy's booties pattern |
 |
| Eagle Hat from Creative Jewish Mom |
 |
| Crochetme's Christmas Tree (free pattern) |

