Recent Posts

Showing posts with label video tutorials. Show all posts
Showing posts with label video tutorials. Show all posts
Sunday, September 30, 2012
Quick Tip: Finding Both Yarn Ends of Your Skein
Stitch and Unwind has pointed out a useful video and instructions on how to find the two yarn ends of your skein on allfreeknitting.com. Take a look. (Another great tip they mentioned in the video is to pull both ends of a clump of tangled yarn to unwind it)
Monday, August 27, 2012
Amigurumi Basics by a Beginner V:
5 More Basic Stitches & Techniques
Here're five more basic amigurumi techniques (click here for Part I):
7. Magic Circle or Ring
Now that you've mastered the single crochet, let's go back and learn the magic ring, the preferred way of starting an amigurumi round.
Also called: adjustable ring, magic loop
Good to know: You can substitute the initial "Ch 2. __ sc in 2nd chain from hook" instruction with the magic ring, doing the designated number of single crochets in the ring.
Tutorial: Check out my previous post.
8. Increase
Abbreviation: inc
How to: If you know how to do a single crochet, you know how to increase. Instead of working one single crochet into a stitch, you do more than one, which will increase the overall width (in rows) or circumference (in rounds).
Sometimes the pattern will just say "2 stitches in the next stitch", instead of "increase", and that's exactly what this is.
Purpose: Increasing (and decreasing) helps shape your amigurumi.
Good to know:
• Usually you will space out your increases evenly across the round. In patterns, for example, you'll see:
• Increases are easy to do, but keeping track of how many stitches you've done and when you need to increase can be tricky in the beginning. Try a stitch counter.
9. Right Side and Wrong Side
• The "right side" (abbreviation: RS) = the front of your piece
• The "wrong" side= the back.
How to tell: The stitches look different (check out the video below)
Another quick way to tell in amigurumi that is worked in rounds is that the side with the yarn tail from your magic circle sticking out is the "wrong" side.
Good to know: Whether you choose to show the right or the wrong side of your piece to the world is really up to you, and unlike the names, there really is no right or wrong. To ensure your amigurumi's surface looks uniform, you just have to make sure that all your pieces have the same side showing.
More information and comparison:
• All About Ami
• Video from Nerdigurumi comparing the differences. Interestingly, the sizes and shapes of the balls change depending on which side you've showing:
10. Front Loops and Back Loops
You will come across instructions that tell you to work in a specific part of a stitch, so what are they talking about exactly?
Let Stitch Diva Studio explain with a photo tutorial.
Good to know: Stitches that are worked in, for example, just the front loop, will look different from stitches that are worked in, say, the back loops. Crochet makes use of the different looks to add texture to your piece.
Take a look at this Crochet Spot's comparison.
11. Decrease
Abbreviation: dec, sc2tog (single crochet 2 together)
We saw how an increase makes the "circle" get bigger earlier. To make it go smaller, you'll need a decrease. Here, you're trying to join two stitches in the previous round together by making one stitch only.
How to:
1. Skip a stitch: generally not recommended because of the hole you'll leave in your piece.
2. Insert the hook into one stitch, yarn over, and draw up a loop. You don't complete that stitch, but insert the hook immediately into the next stitch, yarn over, and draw up another loop. Now you've three loops on your hook. You yarn over, and pull through all loops at once.
However...
I've never done anything but Planet June's invisible decrease to make sure the amigurumi looks as good as it can without too many bumps and holes caused by the decrease.
You can also check out All About Ami's photo tutorial on how to do an invisible decrease.
p.s. An invisible decrease requires you to work in the front loops, hence all that talk earlier about parts of a stitch.
Putting it all together: Let's crochet something already!
Now that you have all these stitches and techniques in your bag, let's try doing a common sphere shape, which will make use of the magic circle, single crochet, increase and decrease.
I find following videos and crocheting along is one of the best way to learn. Reading instructions can give you a headache sometimes, but if you've someone there to guide you through it's a lot less painful.
Here's one version of crocheting a ball. You'll find others on youtube.
7. Magic Circle or Ring
 |
| See my earlier post on how to do the magic ring |
Also called: adjustable ring, magic loop
Good to know: You can substitute the initial "Ch 2. __ sc in 2nd chain from hook" instruction with the magic ring, doing the designated number of single crochets in the ring.
Tutorial: Check out my previous post.
8. Increase
Abbreviation: inc
How to: If you know how to do a single crochet, you know how to increase. Instead of working one single crochet into a stitch, you do more than one, which will increase the overall width (in rows) or circumference (in rounds).
Sometimes the pattern will just say "2 stitches in the next stitch", instead of "increase", and that's exactly what this is.
Purpose: Increasing (and decreasing) helps shape your amigurumi.
Good to know:
• Usually you will space out your increases evenly across the round. In patterns, for example, you'll see:
*1 sc in the next 2 st, inc* repeat 2 times
We'll look at deciphering patterns later, but the above basically means:
Stitch 1: 1 single crochet
Stitch 2: 1 single crochet
Stitch 3: 2 single crochets in the same stitch (= increase)
Stitch 4: 1 single crochet
Stitch 5: 1 single crochet
Stitch 6: 2 single crochets in the same stitch (= increase)
In your previous round, you have 6 stitches, and in this round, you'll have 8 stitches because of the increase.
• It's important to keep your increases gradual and incremental. If you increase too drastically right away, you'll end up having a bunched up look.• Increases are easy to do, but keeping track of how many stitches you've done and when you need to increase can be tricky in the beginning. Try a stitch counter.
9. Right Side and Wrong Side
• The "right side" (abbreviation: RS) = the front of your piece
• The "wrong" side= the back.
How to tell: The stitches look different (check out the video below)
Another quick way to tell in amigurumi that is worked in rounds is that the side with the yarn tail from your magic circle sticking out is the "wrong" side.
Good to know: Whether you choose to show the right or the wrong side of your piece to the world is really up to you, and unlike the names, there really is no right or wrong. To ensure your amigurumi's surface looks uniform, you just have to make sure that all your pieces have the same side showing.
More information and comparison:
• All About Ami
• Video from Nerdigurumi comparing the differences. Interestingly, the sizes and shapes of the balls change depending on which side you've showing:
10. Front Loops and Back Loops
You will come across instructions that tell you to work in a specific part of a stitch, so what are they talking about exactly?
Let Stitch Diva Studio explain with a photo tutorial.
 |
| Source: Stitch Diva Studio |
Take a look at this Crochet Spot's comparison.
11. Decrease
Abbreviation: dec, sc2tog (single crochet 2 together)
We saw how an increase makes the "circle" get bigger earlier. To make it go smaller, you'll need a decrease. Here, you're trying to join two stitches in the previous round together by making one stitch only.
How to:
1. Skip a stitch: generally not recommended because of the hole you'll leave in your piece.
2. Insert the hook into one stitch, yarn over, and draw up a loop. You don't complete that stitch, but insert the hook immediately into the next stitch, yarn over, and draw up another loop. Now you've three loops on your hook. You yarn over, and pull through all loops at once.
However...
I've never done anything but Planet June's invisible decrease to make sure the amigurumi looks as good as it can without too many bumps and holes caused by the decrease.
Source: Planet June. Click here for the left-handed version
You can also check out All About Ami's photo tutorial on how to do an invisible decrease.
p.s. An invisible decrease requires you to work in the front loops, hence all that talk earlier about parts of a stitch.
Putting it all together: Let's crochet something already!
Now that you have all these stitches and techniques in your bag, let's try doing a common sphere shape, which will make use of the magic circle, single crochet, increase and decrease.
I find following videos and crocheting along is one of the best way to learn. Reading instructions can give you a headache sometimes, but if you've someone there to guide you through it's a lot less painful.
Here's one version of crocheting a ball. You'll find others on youtube.
Video from unwindpatterns
Note: The crocheter in the video uses two different decreases techniques. You can see how your piece will look, and you can also substitute one row with the invisible decrease and see which method you like better.
Sunday, July 29, 2012
Learn: Magic Circle or Magic Ring
|
In first round of a pattern, when you see
Ch 2, 6 sc in second ch from hook
Just substitute it with a magic ring that has, in this case, 6 sc in it.

Prefer to watch someone demo it? You'll find lots of magic ring videos online. Here are two different ways to do it:
Source: PlanetJune
Source: apinchofhope
Have fun with your amigurumi!
Thursday, July 19, 2012
Watch: How to Crochet Crocodile Stitch
The crocodile stitch (sometimes known as mermaid tears) is a really interesting looking stitch that creates what looks like scales. It's time consuming though (compounded by the fact that I'm new and slow), since you have to do a base row first, and then put the scales "on top" of it. However, this crocodile stitch is fun to do and definitely worth your time.
Learning the crocodile stitch: Many have commented on how it can take a while to figure out the crocodile stitch, but this wonderful video tutorial from Mikey and the Crochet Crowd explains things really well. As usual, there are lots of similar videos showing you how to do the stitch so watch a few different ones to find the instruction that makes the most sense to you.
What can you make with crocodile stitches? Most common things I've seen include scarves, purses, wrist/neckwarmers, shawls and hats, but me being not a big fan of pretty things, the following creations are more much inspiring for me. I'm going to work on a few things with my new skill in the next few days. Let see if I can make it work.
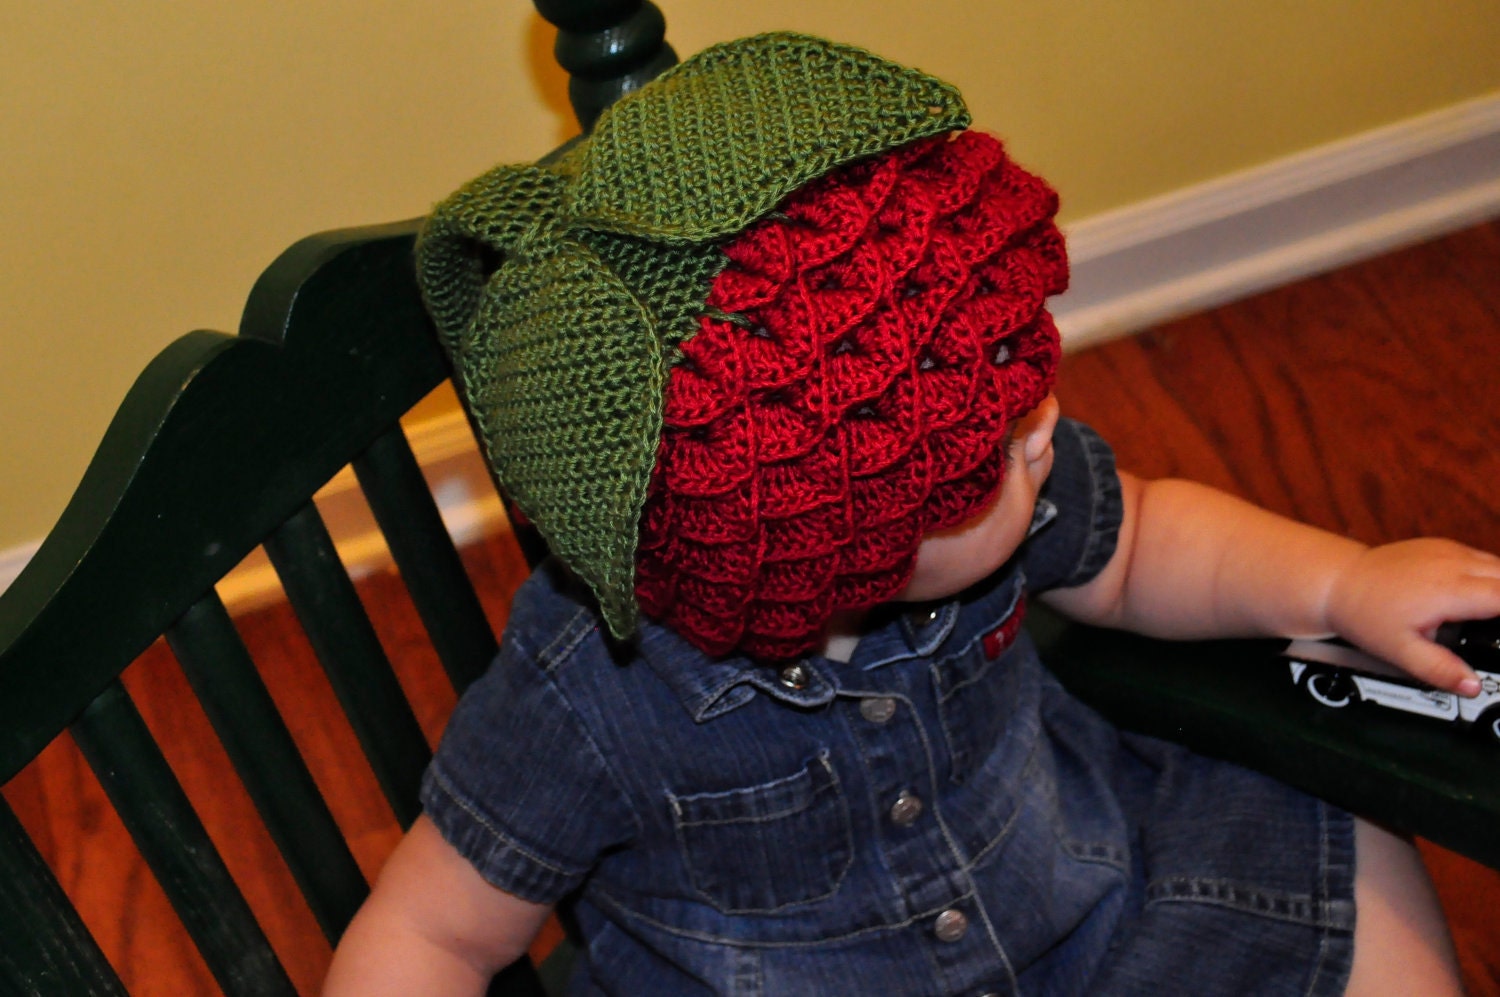 |
| Berry Hat from Craftsy |
 |
| Chain Mail on Craftzine |
 |
| Craftsy's booties pattern |
 |
| Eagle Hat from Creative Jewish Mom |
 |
| Crochetme's Christmas Tree (free pattern) |
Sunday, July 15, 2012
Quick Tip: Video Tutorials for Amigurumi Beginners
Without all the online videos, I don't think I'll ever learn how to make amigurumi. Once you've got the basics down, amigurumi is indeed not hard to pick up as many claim, but when I first started, I could not for the life of me decipher those diagrams that are supposed to show you how each stitch is formed. Luckily, many great crocheters out there have taken the time to create instructional videos. Thank you!
For me, what got me started on my amigurumi journey is Hook and Needles tutorials. You'll learn how to do single crochet, magic circle, increases and decreases. There is also a tutorial on how to read patterns.
Watching videos is a great way to learn amigurumi. The beauty is, if one video doesn't help, try a different one and you'll be sure to find one that makes sense to you. Try it out if you're starting off.

