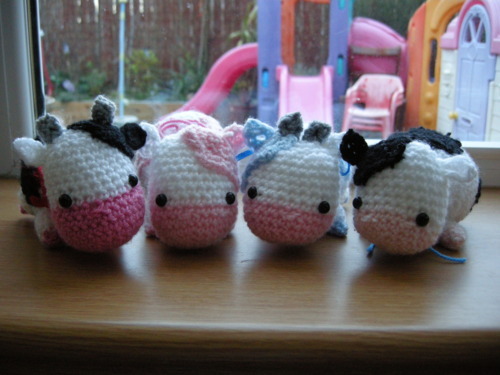
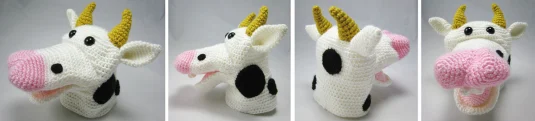
At the fair the other day, we walked through the barn and saw a whole ton of cows. They looked nice and relaxed and kids were all snuggled up with them and didn't bother them one bit. Not as many white and black kinds as you'll find in cow amigurumi though.
Studio Ami has definitely perfected the idea of "cuteness".
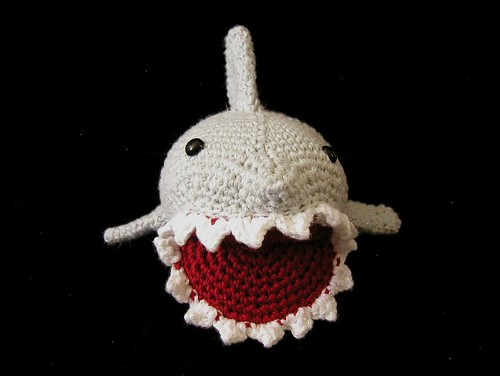
I don't understand what the deal is with Shark Week, but here are some really cool shark crochet patterns. Thanks again for sharing them, you generous people!
Look at this adorable shark hat for the whole family.
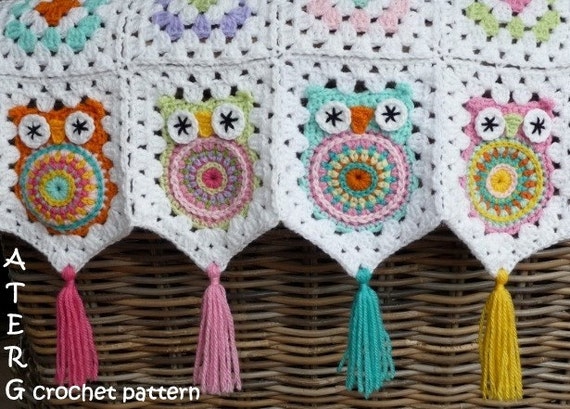
I have finished my crocodile stitch project and made a crochet owl! Learned a fun stitch and used yarn from my favourite colour combinations. I left the top open so I can use this as a holder for stationary, crochet hooks and what not. As I mentioned in my previous post, the crocodile stitches yield a heavy thick layer, so the crochet owl is standing tall and sturdy. I'm going to attempt to write out how I did this (first pattern...eek!). I used this Bernat pattern (site requires registration) and its companion youtube video tutorial as a reference to figure out my crocodile stitch body, and I came up with the other parts. Please post a comment if you notice anything funky or if you've suggestions for me to improve my instructions.
Yarn, Hook and Other Materials: (substitute with your favourite worsted weight yarn and hook size): C hook / 2.75mm hook for the owl body E hook / 3.5mm hook for the rest Loops & Threads Impeccable Aqua
Yarn needle to weave in ends and sew parts together
Black embroidery thread to embroider eyes of owl
Pins to help you position your parts while you sew them together
Dimensions / Gauge:
My owl is approximately 5" tall and 3" wide. Gauge is not applicable in this project.
Abbreviations used:
rnd
round
ch
chain
sc
single crochet
dc
double crochet
st
stitch
sl st
slip stitch
FO
fasten off
Number in ( ) at the end of each round: total number of stitches you should have by the end of the round.
Note:
The crocodile stitch takes up quite a bit of yarn, since each row is made of the base double crochet stitch, plus the crocodile stitch on top of it, so make sure you've enough yarn in the body colour.
Pattern:
Body:
Because I used this Bernat pattern (free pattern available after you register) and its companion youtube video tutorial as my reference, I don't feel right writing out the steps here. Sorry for the inconvenience!
Please do refer to the above to get your owl body done. You can't get better step-by-step instruction than what's provided in the video.
Just a few notes:
-The starting chain should be in multiples of 6 plus that chain-3, which will act as a 1 dc stitch. I did 36 and had 6 crocodile stitches.
-Turn your work 90° so it's verticaland it'll be slightly easier to insert your hook.
-To find the middle point, aka the 3rd dc, of the skipped 5 dc group, I find it helpful to look behind my project for the five posts I've skipped in the previous row.
-When you have completed all the crocodile stitch rows, work rows of sc (the grey part) until the desired height.
Wings (make 2):
I alternate between sc and dc just to make the pattern on the wing more interesting. You can do all sc all if you prefer.
Rnd 1
Ch 3. 1 sc in 2nd chain from hook. 1 sc in the next chain. (3)
Ch 1. Turn.
Rnd 2
2 sc in each st (4)
Ch 1. Turn.
Rnd 3
*1 sc in next st, then 2 sc in next st (inc)* repeat 2 times (6)
Ch 1. Turn.
Rnd 4
*1 sc in next 2 st, then 2 sc in next st (inc)* repeat 2 times (8) Ch 3. Turn.
Rnd 5
*1 dc in next 3 st, then 2 dc in next st (inc)* repeat 2 times (10)
Ch 1. Turn.
Rnd 6
1 sc in each stitch (10)
Ch 3. Turn.
Rnd 7
1 dc in each stitch (10)
Ch 1. Turn.
Rnd 8
1 sc in each stitch (10)
Ch 3. Turn.
Rnd 9
1 dc in each stitch (10)
Ch 1. Turn.
Rnd 10
1 sc in each stitch (10)
Ch 3. Turn.
Rnd 11
1 dc in each stitch (10)
When you reach the end, FO, or sc around the edge of the wing.
Leave tail for sewing.
(I personally like it better with the edging but it's optional.)
Eyes (make 2):
Rnd 1
Make a magic ring with 6 stitches in it. (6)
Rnd 2
2 sc in each st. (12)
Rnd 3
*1 sc in next st, then 2 sc in next st (inc)* repeat 6 times (18)
Rnd 4
*1 sc in next 2 st, then 2 sc in next st (inc)* repeat 6 times (24)
Rnd 5
*1 sc in next 3 st, then 2 sc in next st (inc)* repeat 6 times (30)
Fasten off and leave tail to sew to body. Embroider Owl's sleepy eyes, or make an awake version and use a small piece of felt circle as eyes.
Nose:
Rnd 1
Make a magic ring with 6 stitches in it. (6)
Rnd 2
*1 sc in next st, then 2 sc in next st (inc)* repeat 3 times (9)
Rnd 3
*1 sc in next 2 st, then 2 sc in next st (inc)* repeat 3 times (12)
Rnd 4
*1 sc in next 3 st, then 2 sc in next st (inc)* repeat 3 times (15)
Rnd 5
*1 sc in next 4 st, then 2 sc in next st (inc)* repeat 3 times (18)
Fasten off and leave tail to sew to body.
Assembly Pretty simple. Sew each part to the body (nose and wings before eyes) at the appropriate spot. For the tassel on the two sides:
-Use any of your remaining tail ends, or cut a few short pieces of yarn from the colours you use for your owl. Make them slightly longer than you want the finished tassel to be so you can tie your knot easily. -Use your hook to draw each yarn through one of the stitches near the top. Pull half of the yarn over. -Tie a double knot with all the pieces of yarn. -Cut tassel to desired length.
As usual, this pattern is for personal use only. Please do not sell items made from it (charity okay). Please do not repost pattern anywhere, but link to this post ( http://ow.ly/cyLp8 ). Thanks! Have fun making your own crochet owl!
On my walk yesterday, I saw a strange looking bird that reminds me of a peacock, and that reminds me of this crazy good crochet peacock pattern by CrochetBot3000. Just look at the details on this thing. If you're interested in finger puppets, you should really scroll through the entire blog. It's got free patterns for the A-team, Ironman, Thor, Captain America, The Hulk, and many more animal finger puppets like a Bear, a Frog, etc. Check them out!
My name is Virginia and I thought I'd keep a record of all the neat things I find and learn for other amigurumi and crochet beginners like me. Enjoy your stay here!